Introduction
The Background Differencing Operator is designed to improve edge detection when scanning transparent or highly reflective objects, such as glass, plastic, or chrome-plated components.
By subtracting a reference image of the empty background from the scanned image, the operator effectively isolates the object and removes unwanted background noise caused by uneven lighting on the LED panel, resulting in cleaner and more accurate contours.

Requirements
To use the Background Differencing Operator, an active ContourTrace Premium subscription is required. This subscription provides access to the Image Stitching with Position Markers (ISPM) module.
The ISPM module is used to generate, create, and save background images, which are required by the Background Differencing Operator during processing.
Choosing the Right Conditions to Generate the Background Image
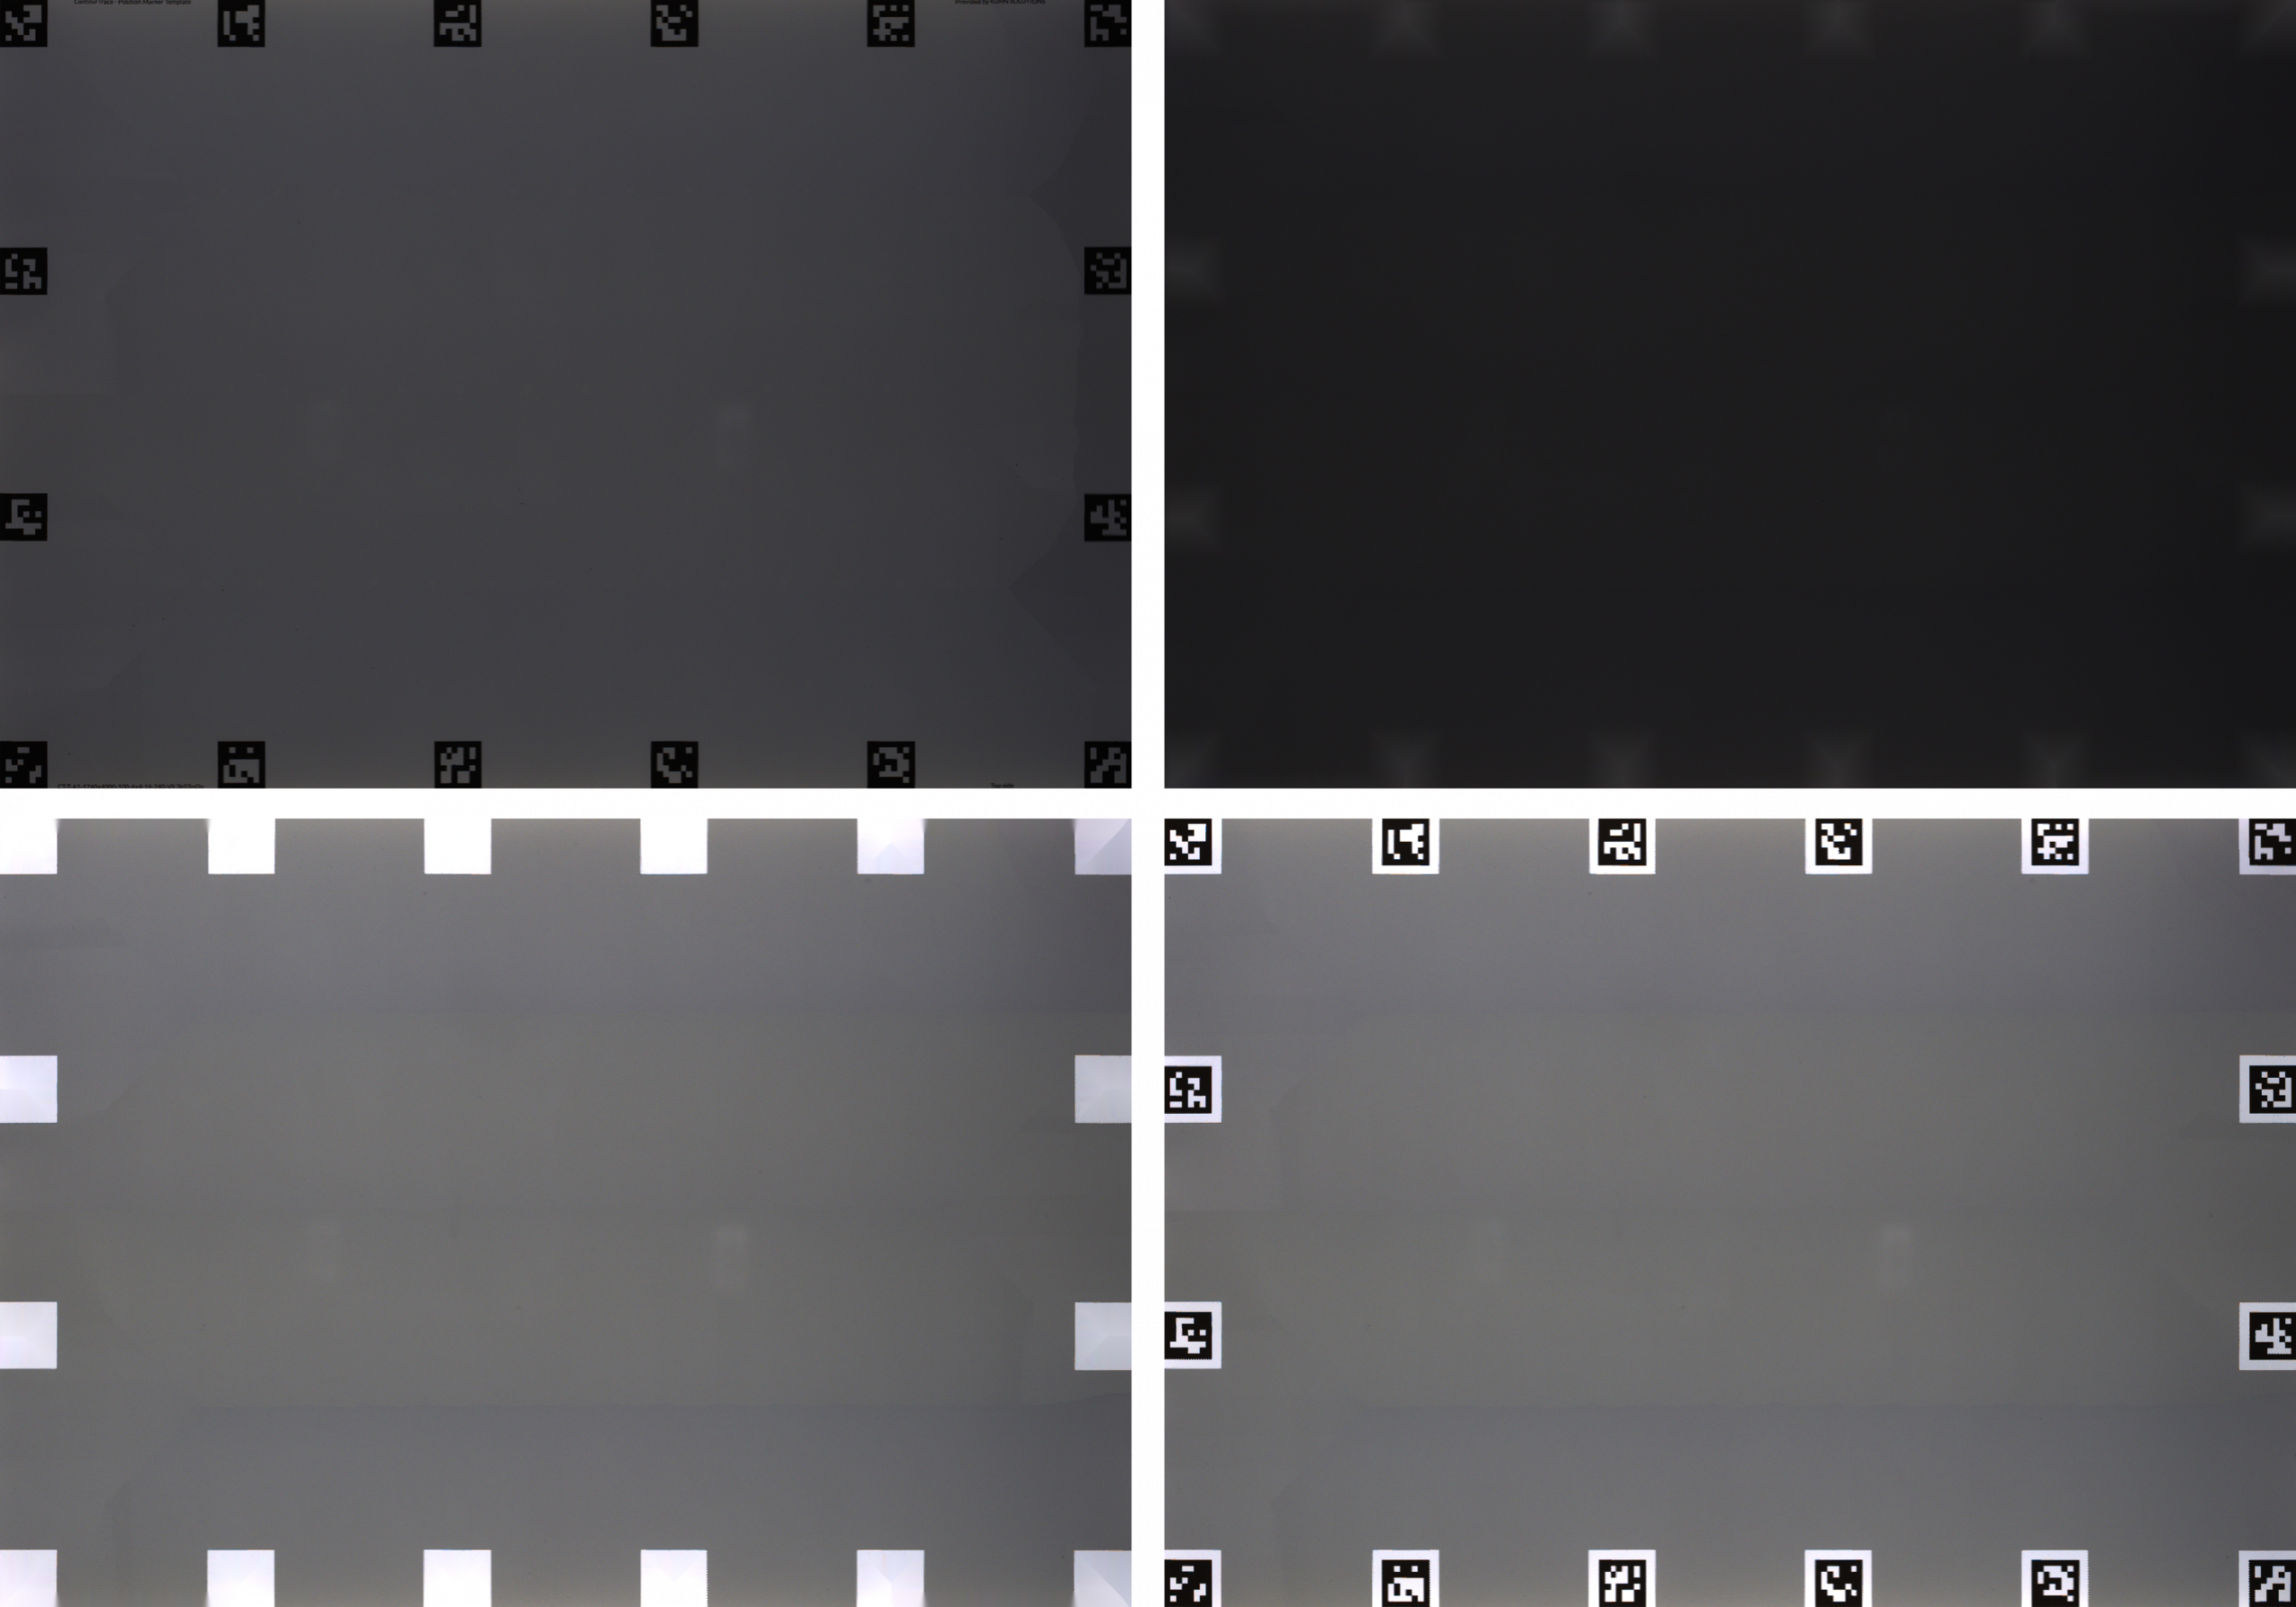
To achieve optimal results, the background image should be created in a controlled, closed environment. The presence of multiple or varying light sources can negatively affect the background differencing process and lead to inaccurate results.
For best performance, we strongly recommend using the Automatic Area Scan Portal when generating the background image.
If a light reflection reduction foil is used with the Automatic Area Scan Portal, set the light plate intensity to its maximum level. Higher light intensity helps the algorithm distinguish the background more clearly, improving the accuracy of the differencing process.
General Guidelines
- Ensure all objects are removed from the position marker template before capturing the background image.
- Verify that the same and correct position marker template is used for both the background image and the object scan. Refer to How to use Position Marker Templates for detailed instructions.
Create a Background Image
Manual Background Image Creation
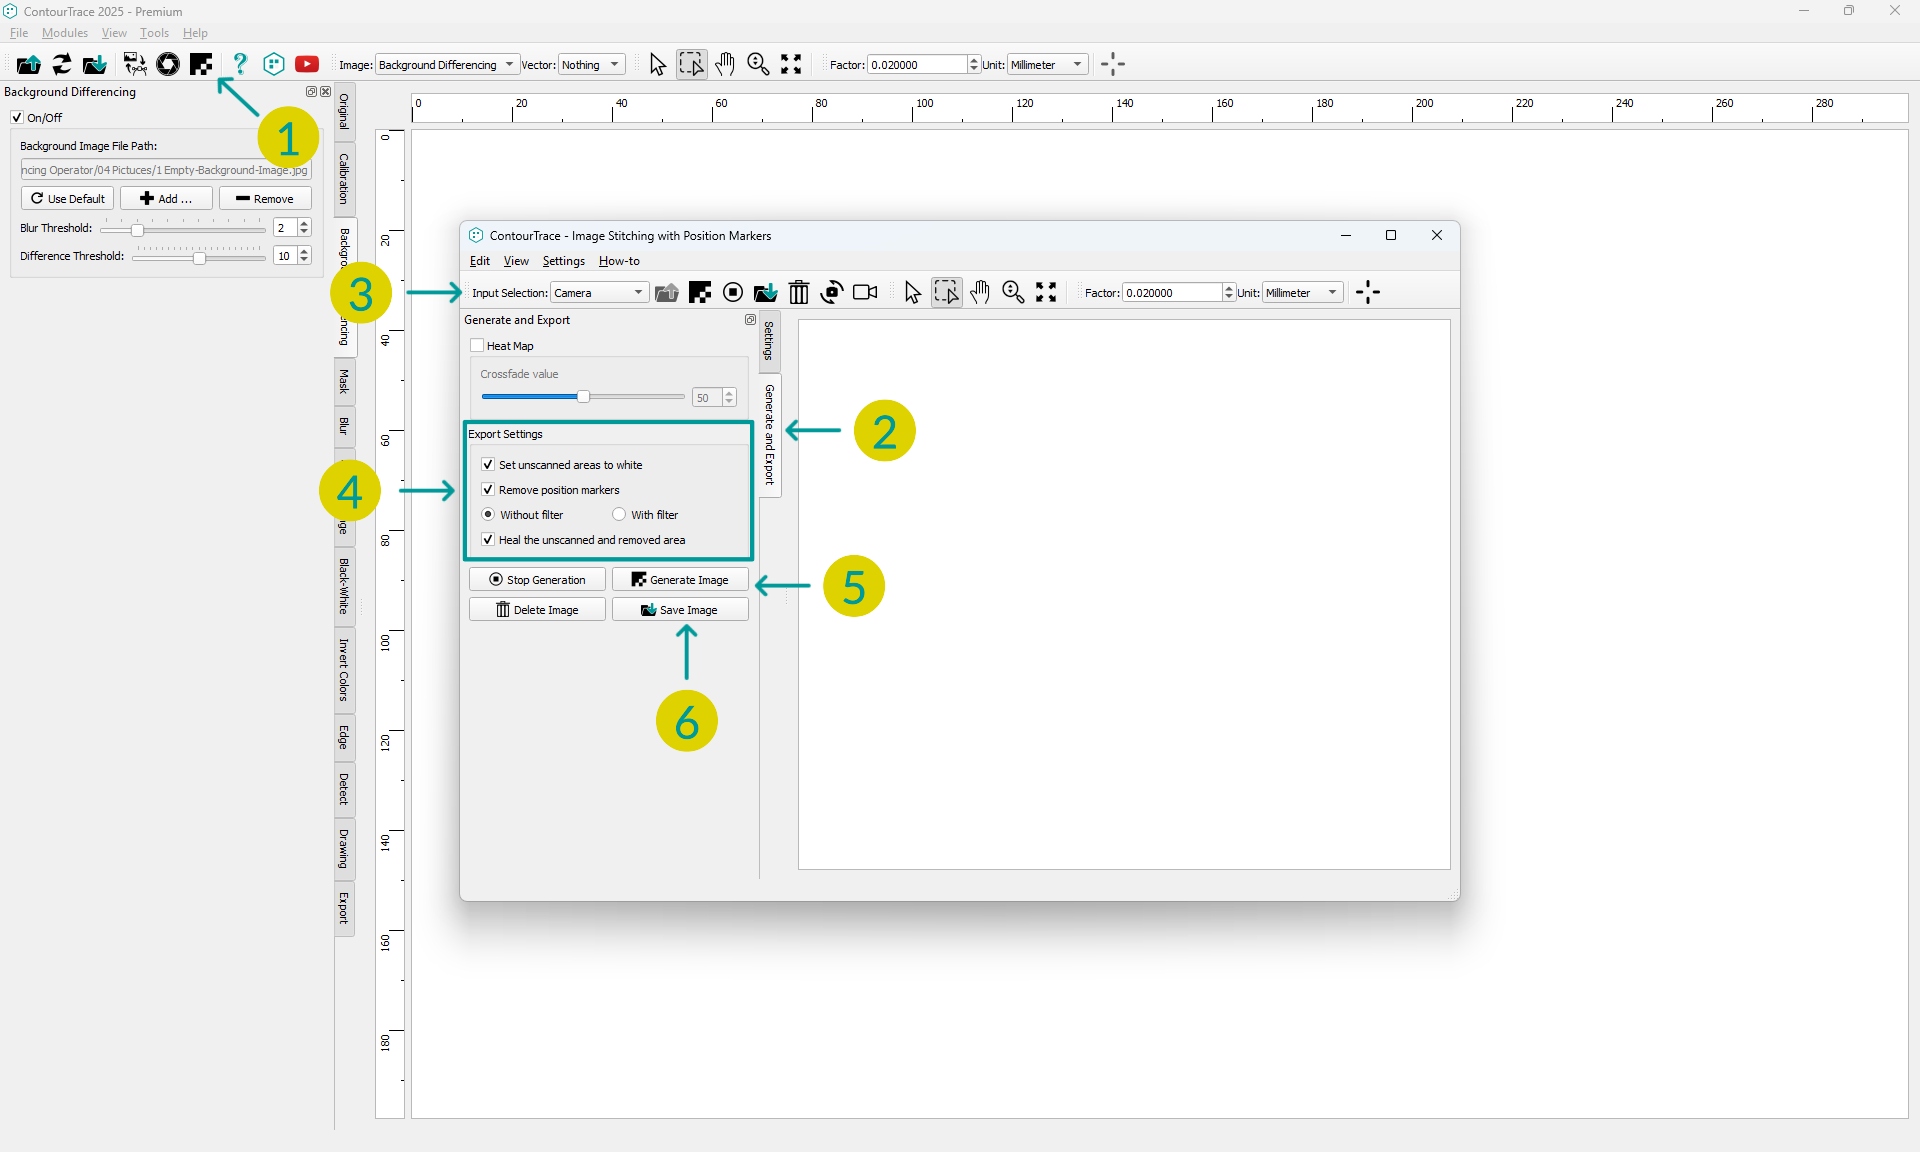
- Launch the ISPM module by clicking its button
- Switch to “Generation and Export” tab
- Select the desired input selection (other than Area Scan Portal – Automatic Operation) for example “Camera”
- Enable all the options under the “Export Settings”
- Click “Generate Image” to start the image stitching process.
- Move the camera slowly and smoothly over the entire position marker template until the full background is scanned.
- After Image Generation process is completed, click on “Save Image” button to save the image in your desired location.
Automatic Background Image Creation
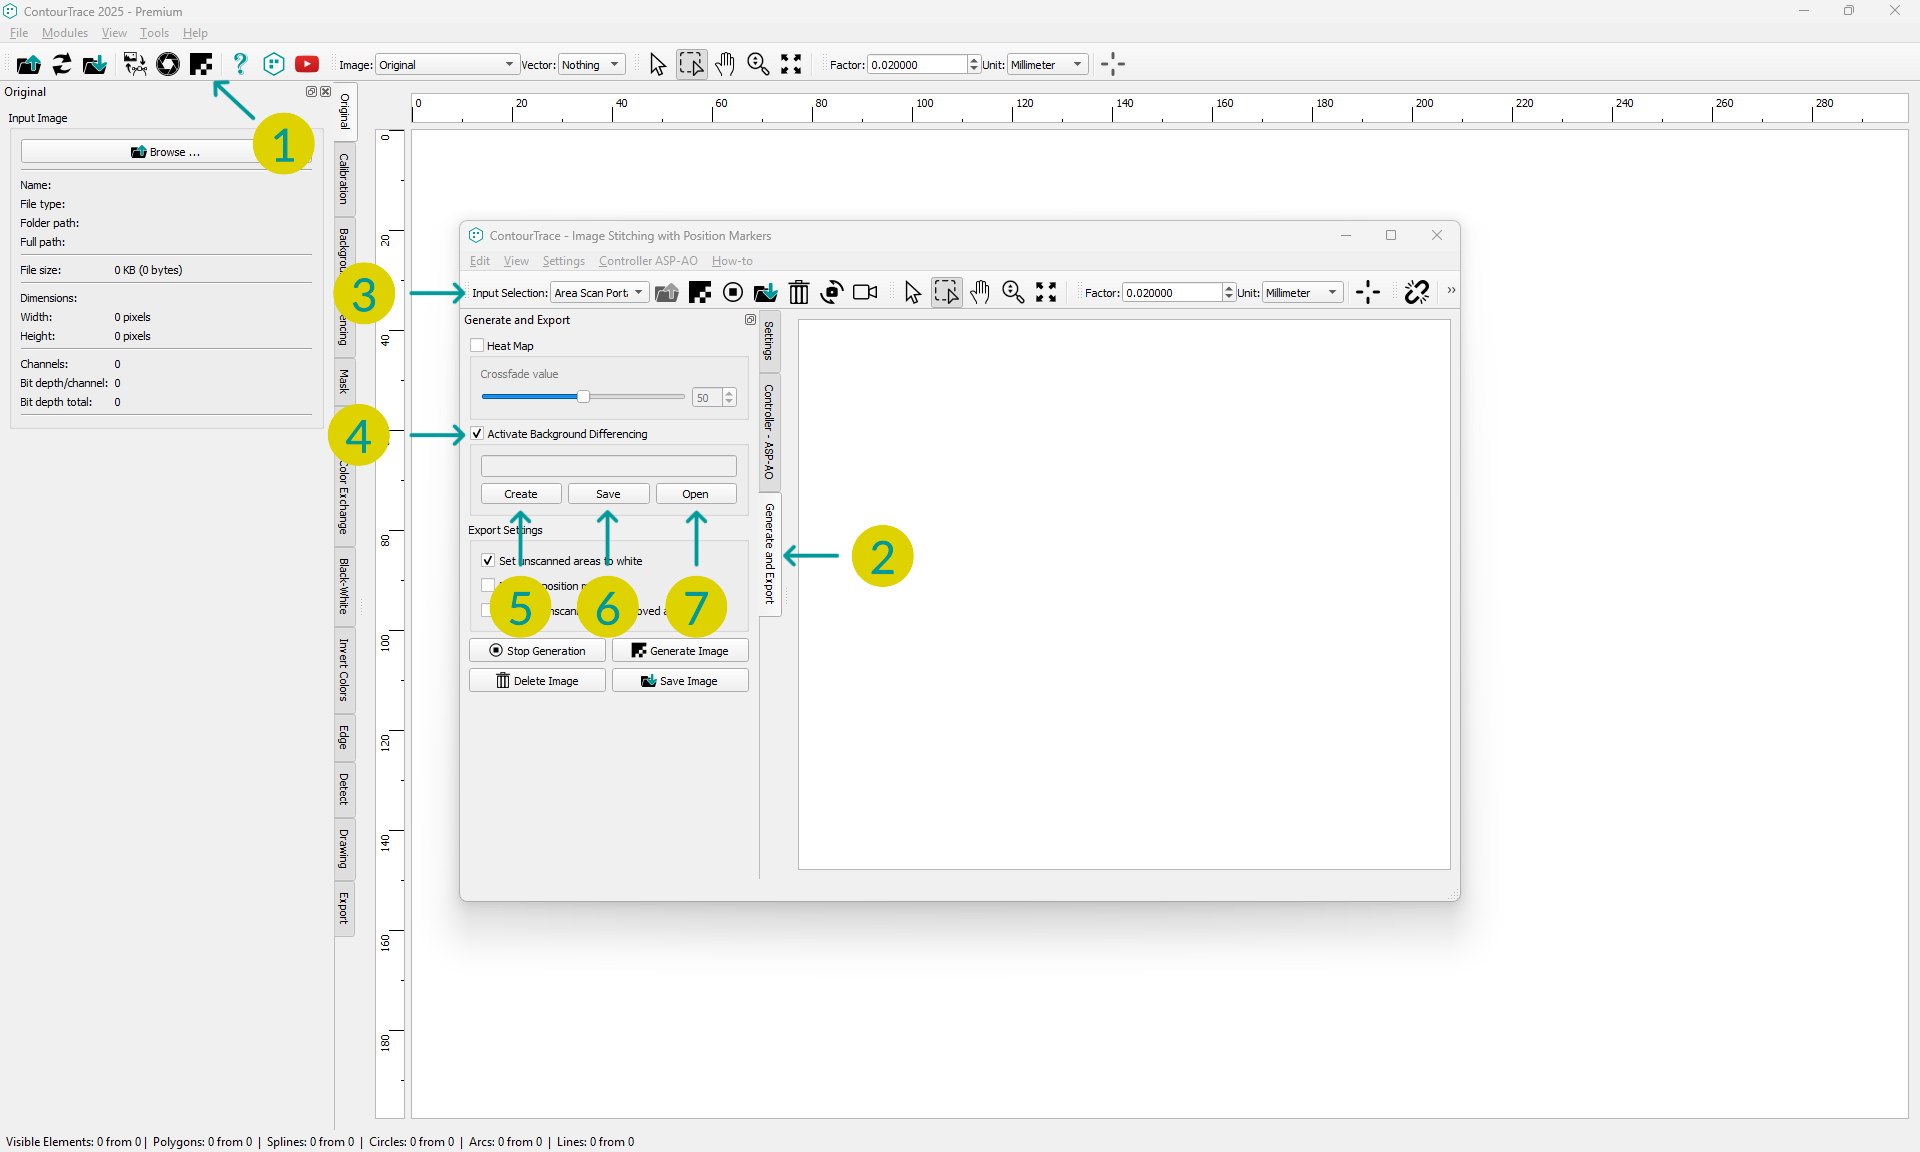
- Launch the ISPM module by clicking the ISPM button.
- Switch to the “Generation and Export” tab.
- Set Input Selection to “Area Scan Portal – Automatic Operation”.
- Activate Background Differencing.
- Click the “Create” button to start the background image generation process.
- You will be prompted to confirm that the Area Scan Portal is empty, and the light intensity is set to maximum.
- Click “Yes” to continue.
- The background image will be generated live.
- Once the image generation is complete, click “Save” to store the background image.
- This saved image will be used by the Background Differencing Operator.
- (Optional) Click “Open” to view the saved background image.
💡 Tip
Always ensure that both images are created in a closed environment with consistent lighting conditions.
Maintain the same lighting setup used for the background image during all future scans. If the lighting conditions change, recreate the background image to ensure accurate results.
How to use the background image on the “Background Differencing” operator
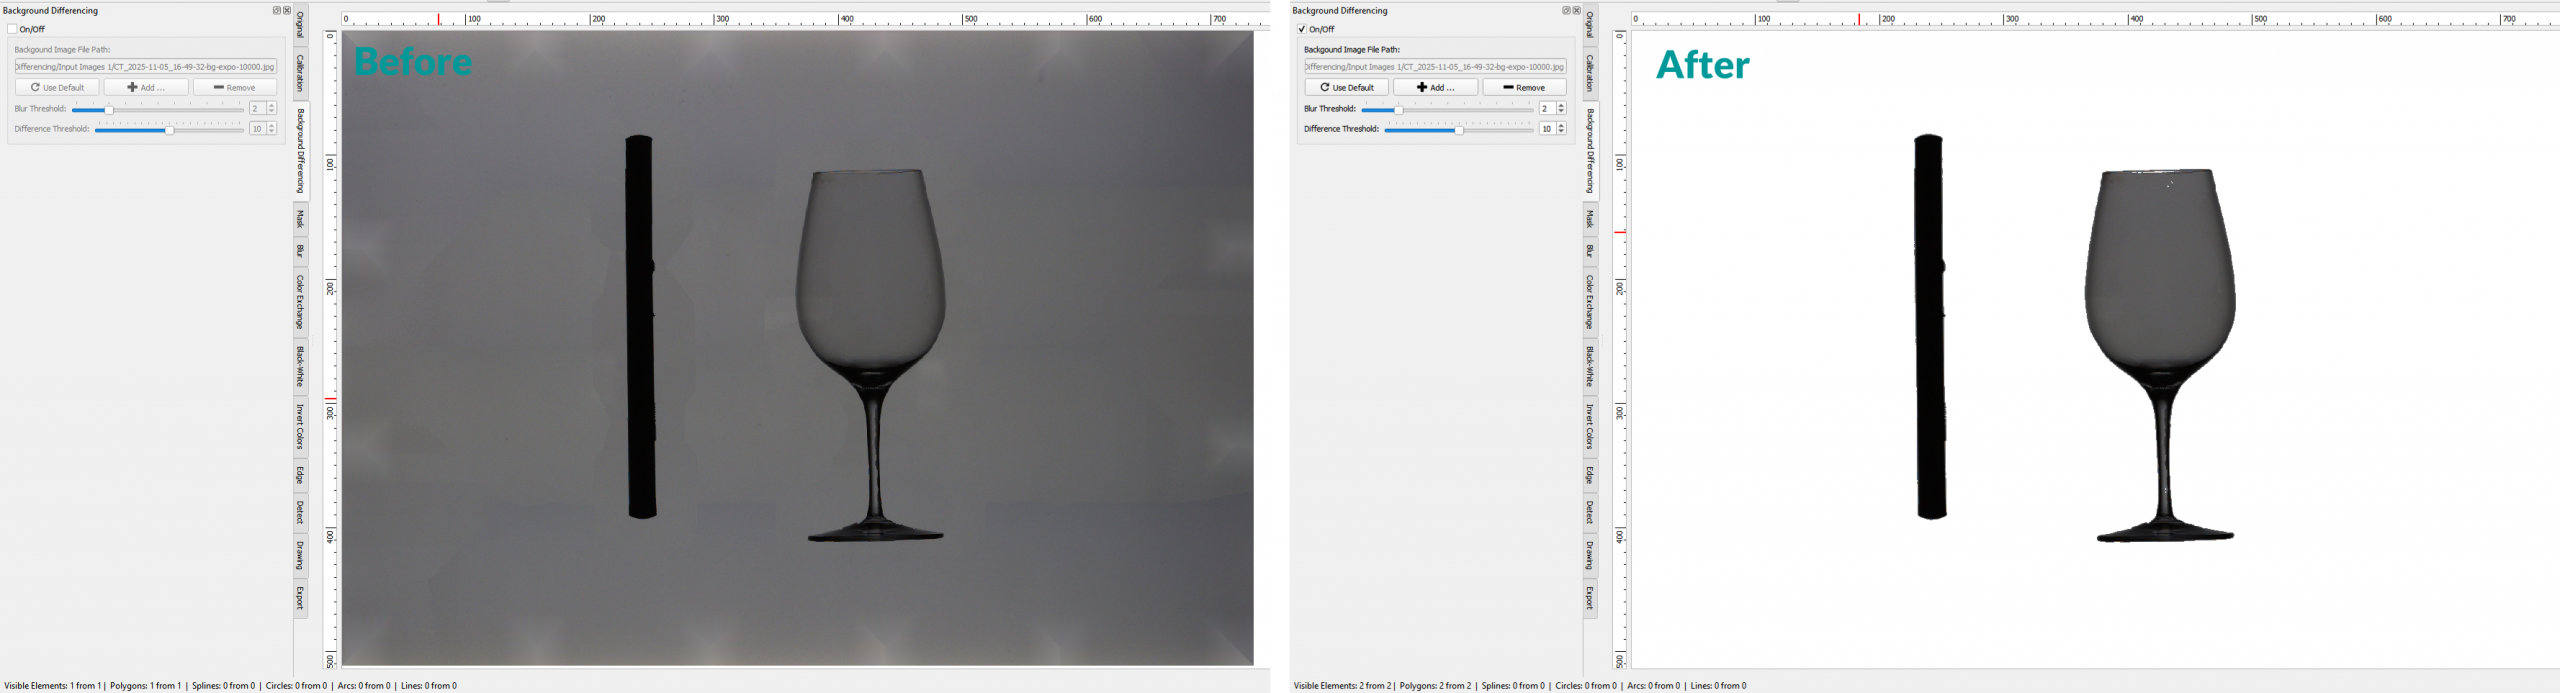
- Go to the “Background Differencing” operator tab in the main application.
- Check the On/Off checkbox to activate the operator.
- If the background image is saved manually
- Click on the “Add” button to browse and select the correct background image.
- Use the “Blur Threshold” and “Difference” till only the objects are visible in the view.
- If the background image is saved using the Automatic Area Scan Portal Saving option
- Click on the “Use Default” button on the operator to load the default image saved in the “ISPM” module
- Use the “Blur Threshold” and “Difference” till only the objects are visible in the view.
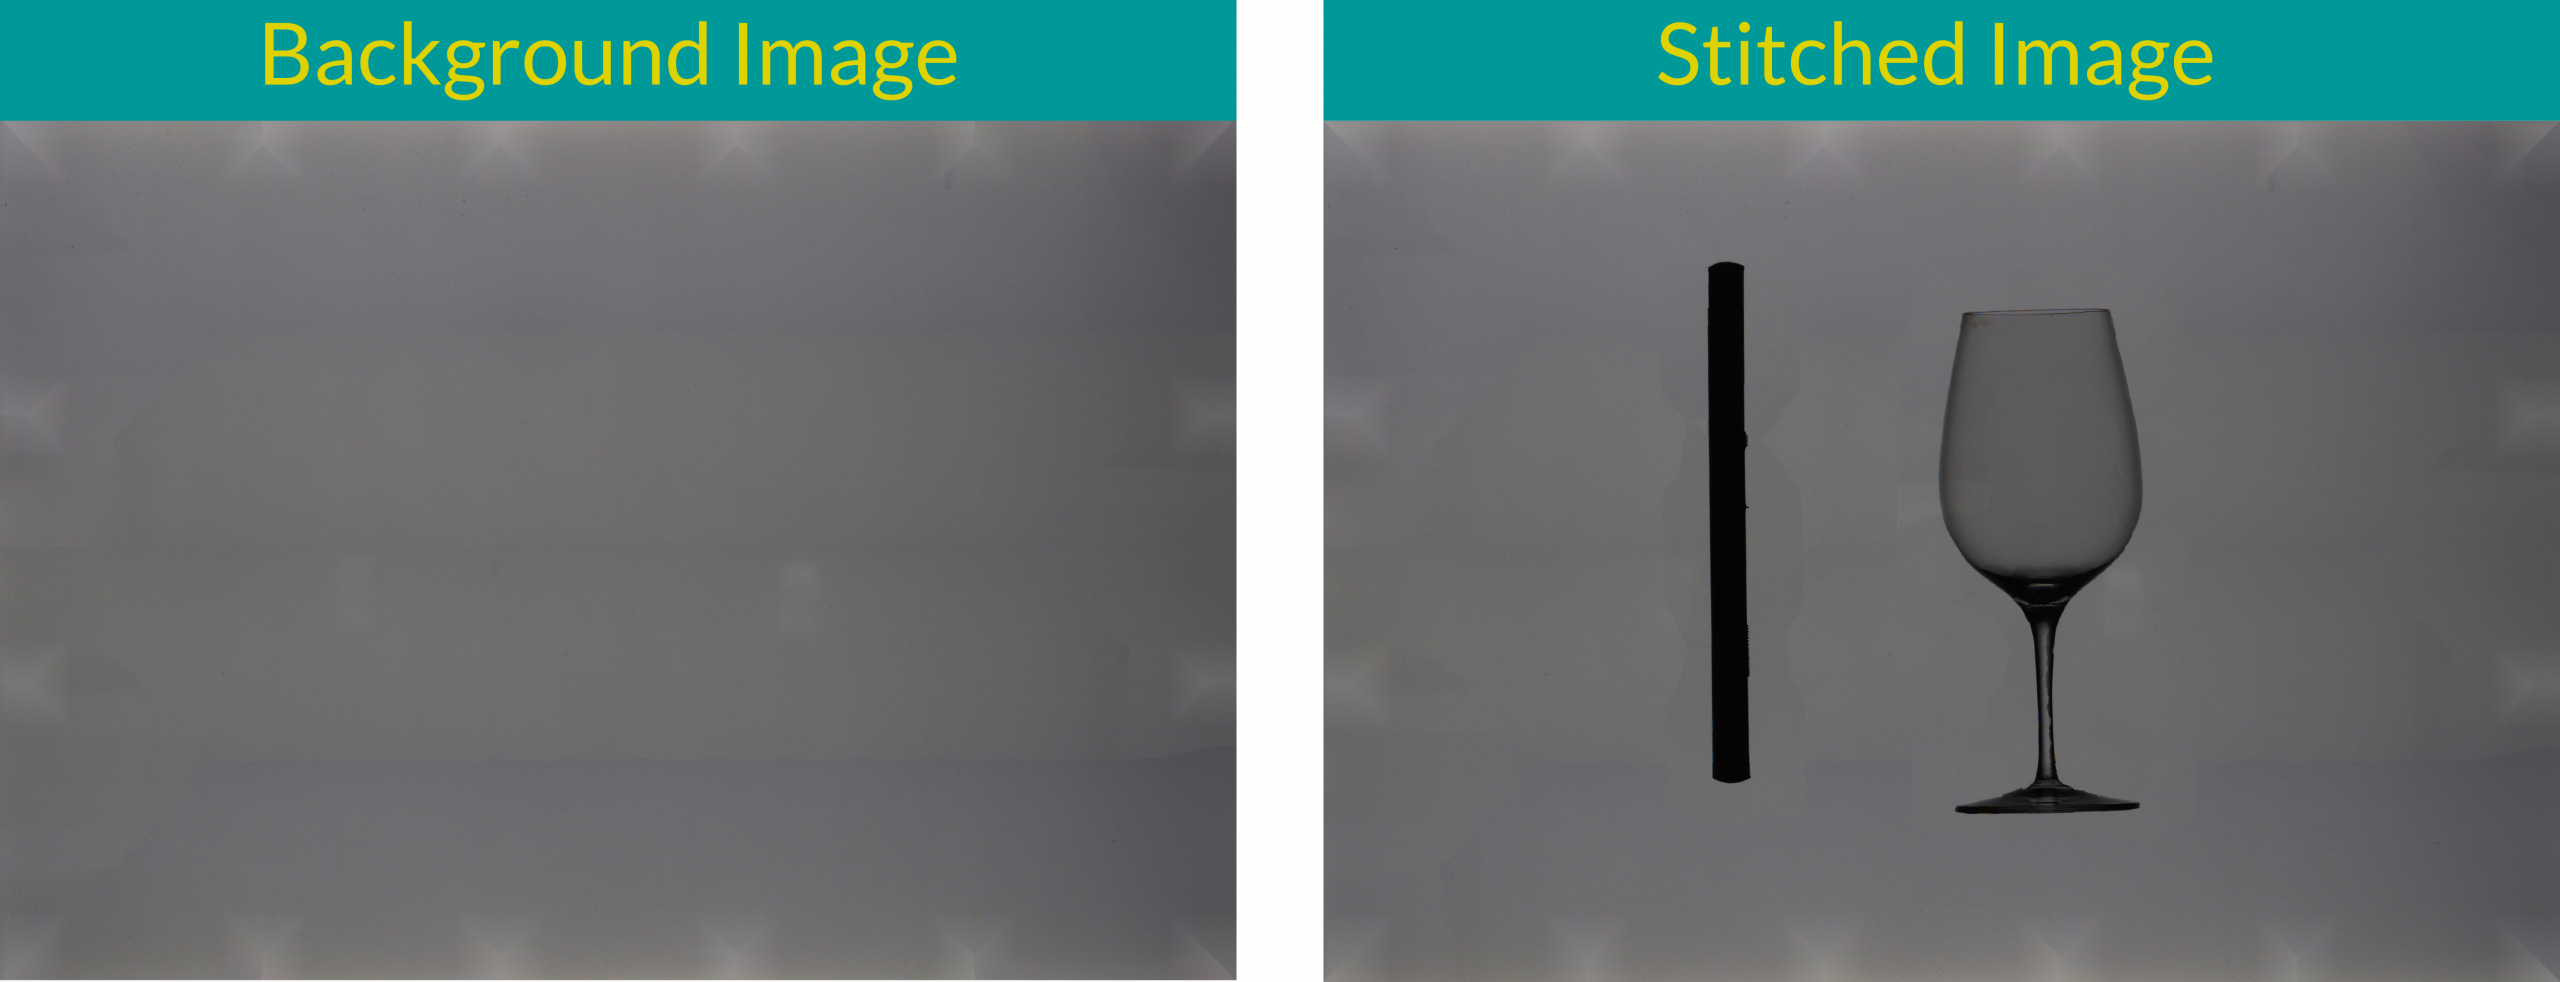
Bad Results for Background Image