Introduction
Position Marker Templates (PMT) play a vital role in the Image Stitching process within ContourTrace.
They help achieve precise detection of object shape, scale, and position during scanning.
PMTs are available in various sizes, including A2, A3, A4, and custom formats, to suit different object dimensions and applications.
Requirements
To use PMTs, you must have an active ContourTrace Premium subscription, which provides access to the Image Stitching with Position Markers (ISPM) module.
Choosing the Right PMT
When selecting a Position Marker Template (PMT), there are two main factors to consider:
- The size of the template
- The number of position markers in the template
These depend on the size and quantity of the objects you want to capture in a single scan.
General Guidelines
- Ensure your object(s) fit completely within the template area.
- For large objects, choose a PMT that has position markers along the border only. This provides maximum usable area for capturing the object.
- For small and multiple objects in one scan, choose a PMT that has additional position markers inside the border.
💡 Tip: Always ensure your entire object(s) can fit completely within the printed area of the PMT.
Downloading the PMT
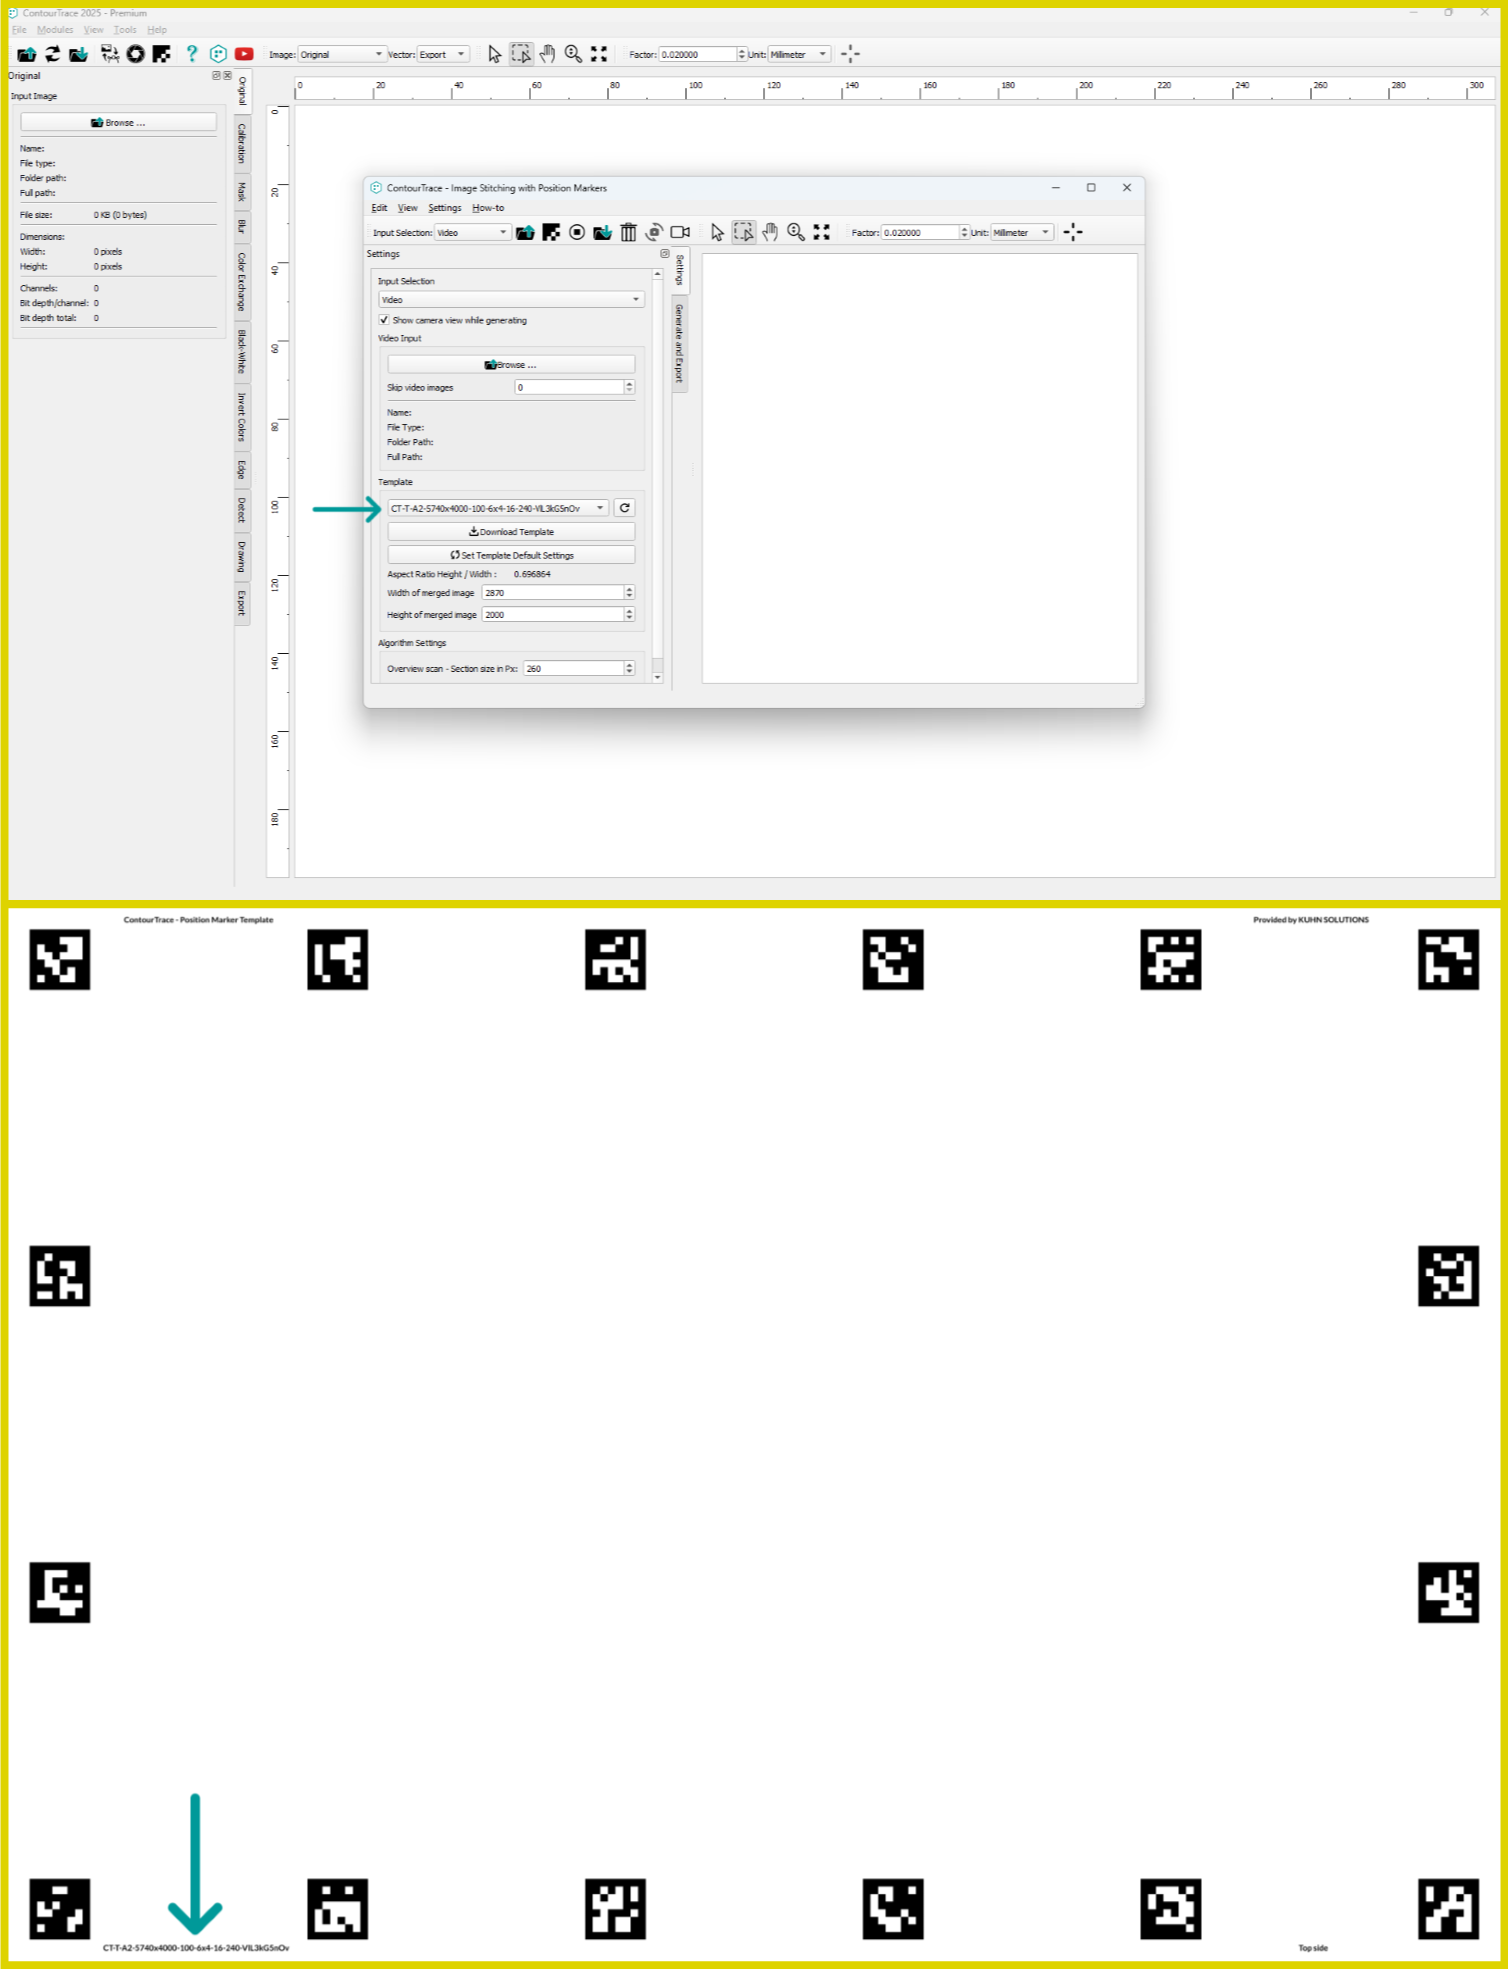
First open the ContourTrace application in your PC, and follow these steps as illustrated in the image below
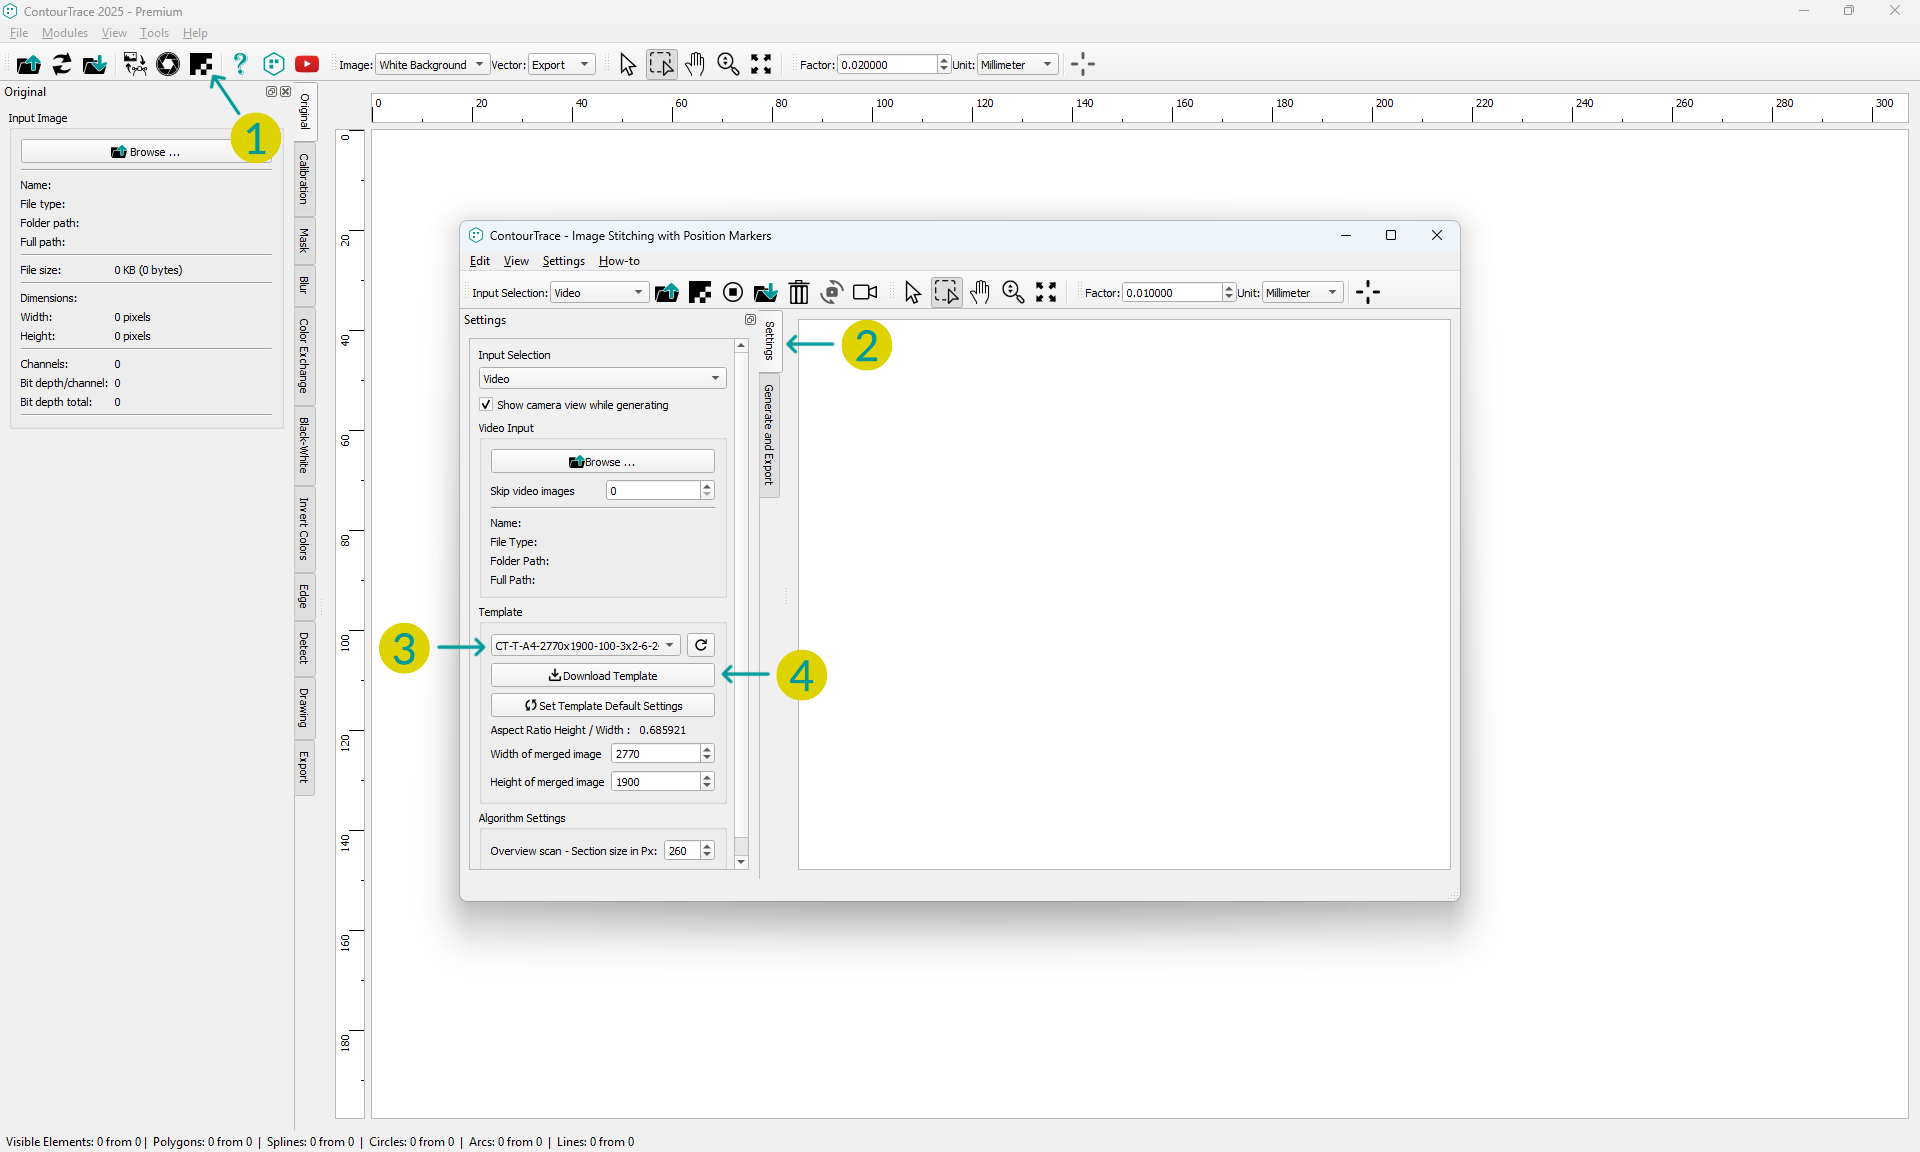
- Launch the ISPM module by clicking its button.
- Open the Settings tab.
- Under the Template section, choose your desired PMT from the dropdown list.
- Click Download Template to open the download page, then save your file.
Printing the PMT
Accurate printing is crucial for successful image stitching.
Printing Setup
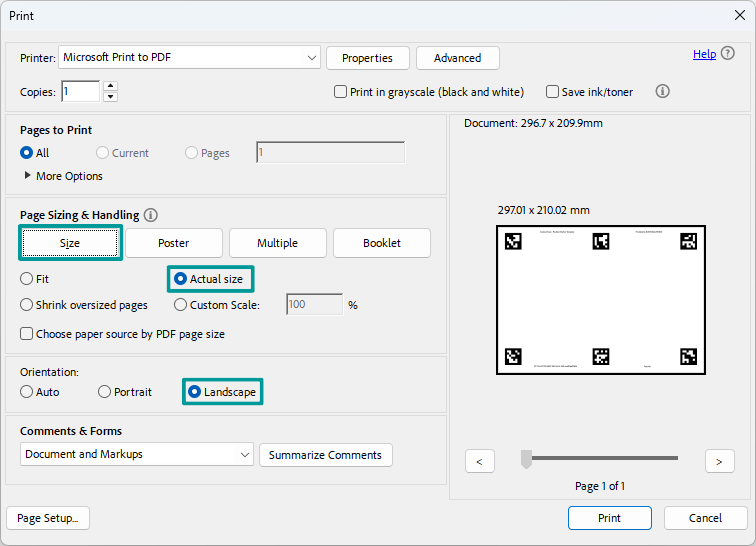
- Page Sizing & Handling: Select Actual Size (no scaling)
- Orientation: Choose Landscape
- Paper Size: Match the PMT size (A2, A3, A4, etc.)
Printing Quality
- Ensure all position markers are clear, sharp, and solid black.
- Avoid ink smudges, faded spots, or stray droplets.
Placing Objects on the Template
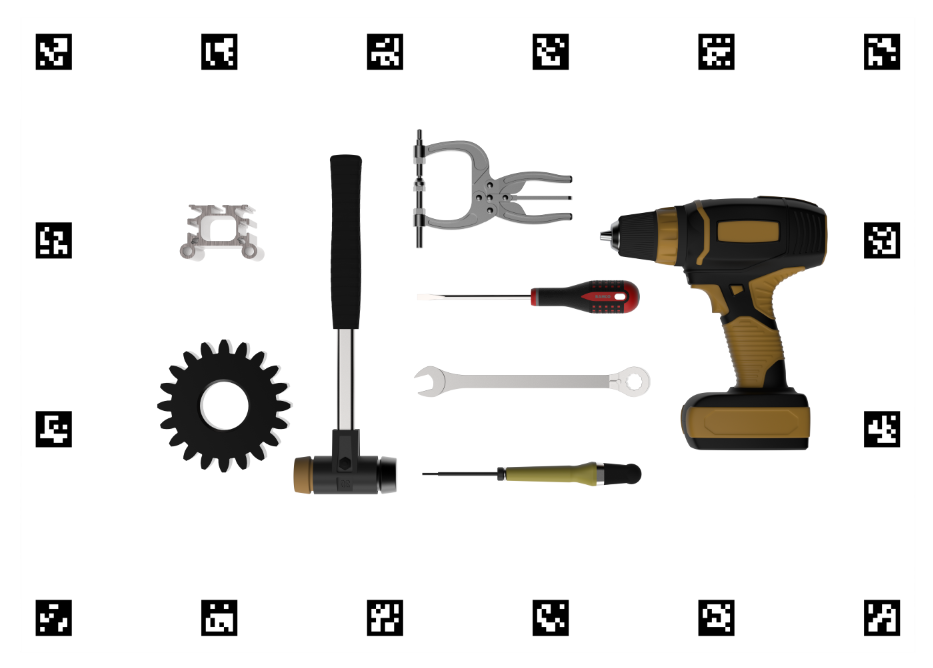
When arranging your objects on the Position Marker Template, follow these important guidelines to ensure accurate image stitching:
| ✅ What to Do | 🚫 What to Avoid |
| Keep all border position markers fully visible. | Do not cover border position markers, even partially. |
| Leave a small gap between your objects and the border position markers. | Do not place objects too close to the border. |
| For internal position markers: make sure they are either fully visible or fully covered. | Do not partially cover internal markers. |
| Choose the correct PMT size for your objects. | Avoid using a template that’s too small or one with internal markers if your object might partially cover them. |
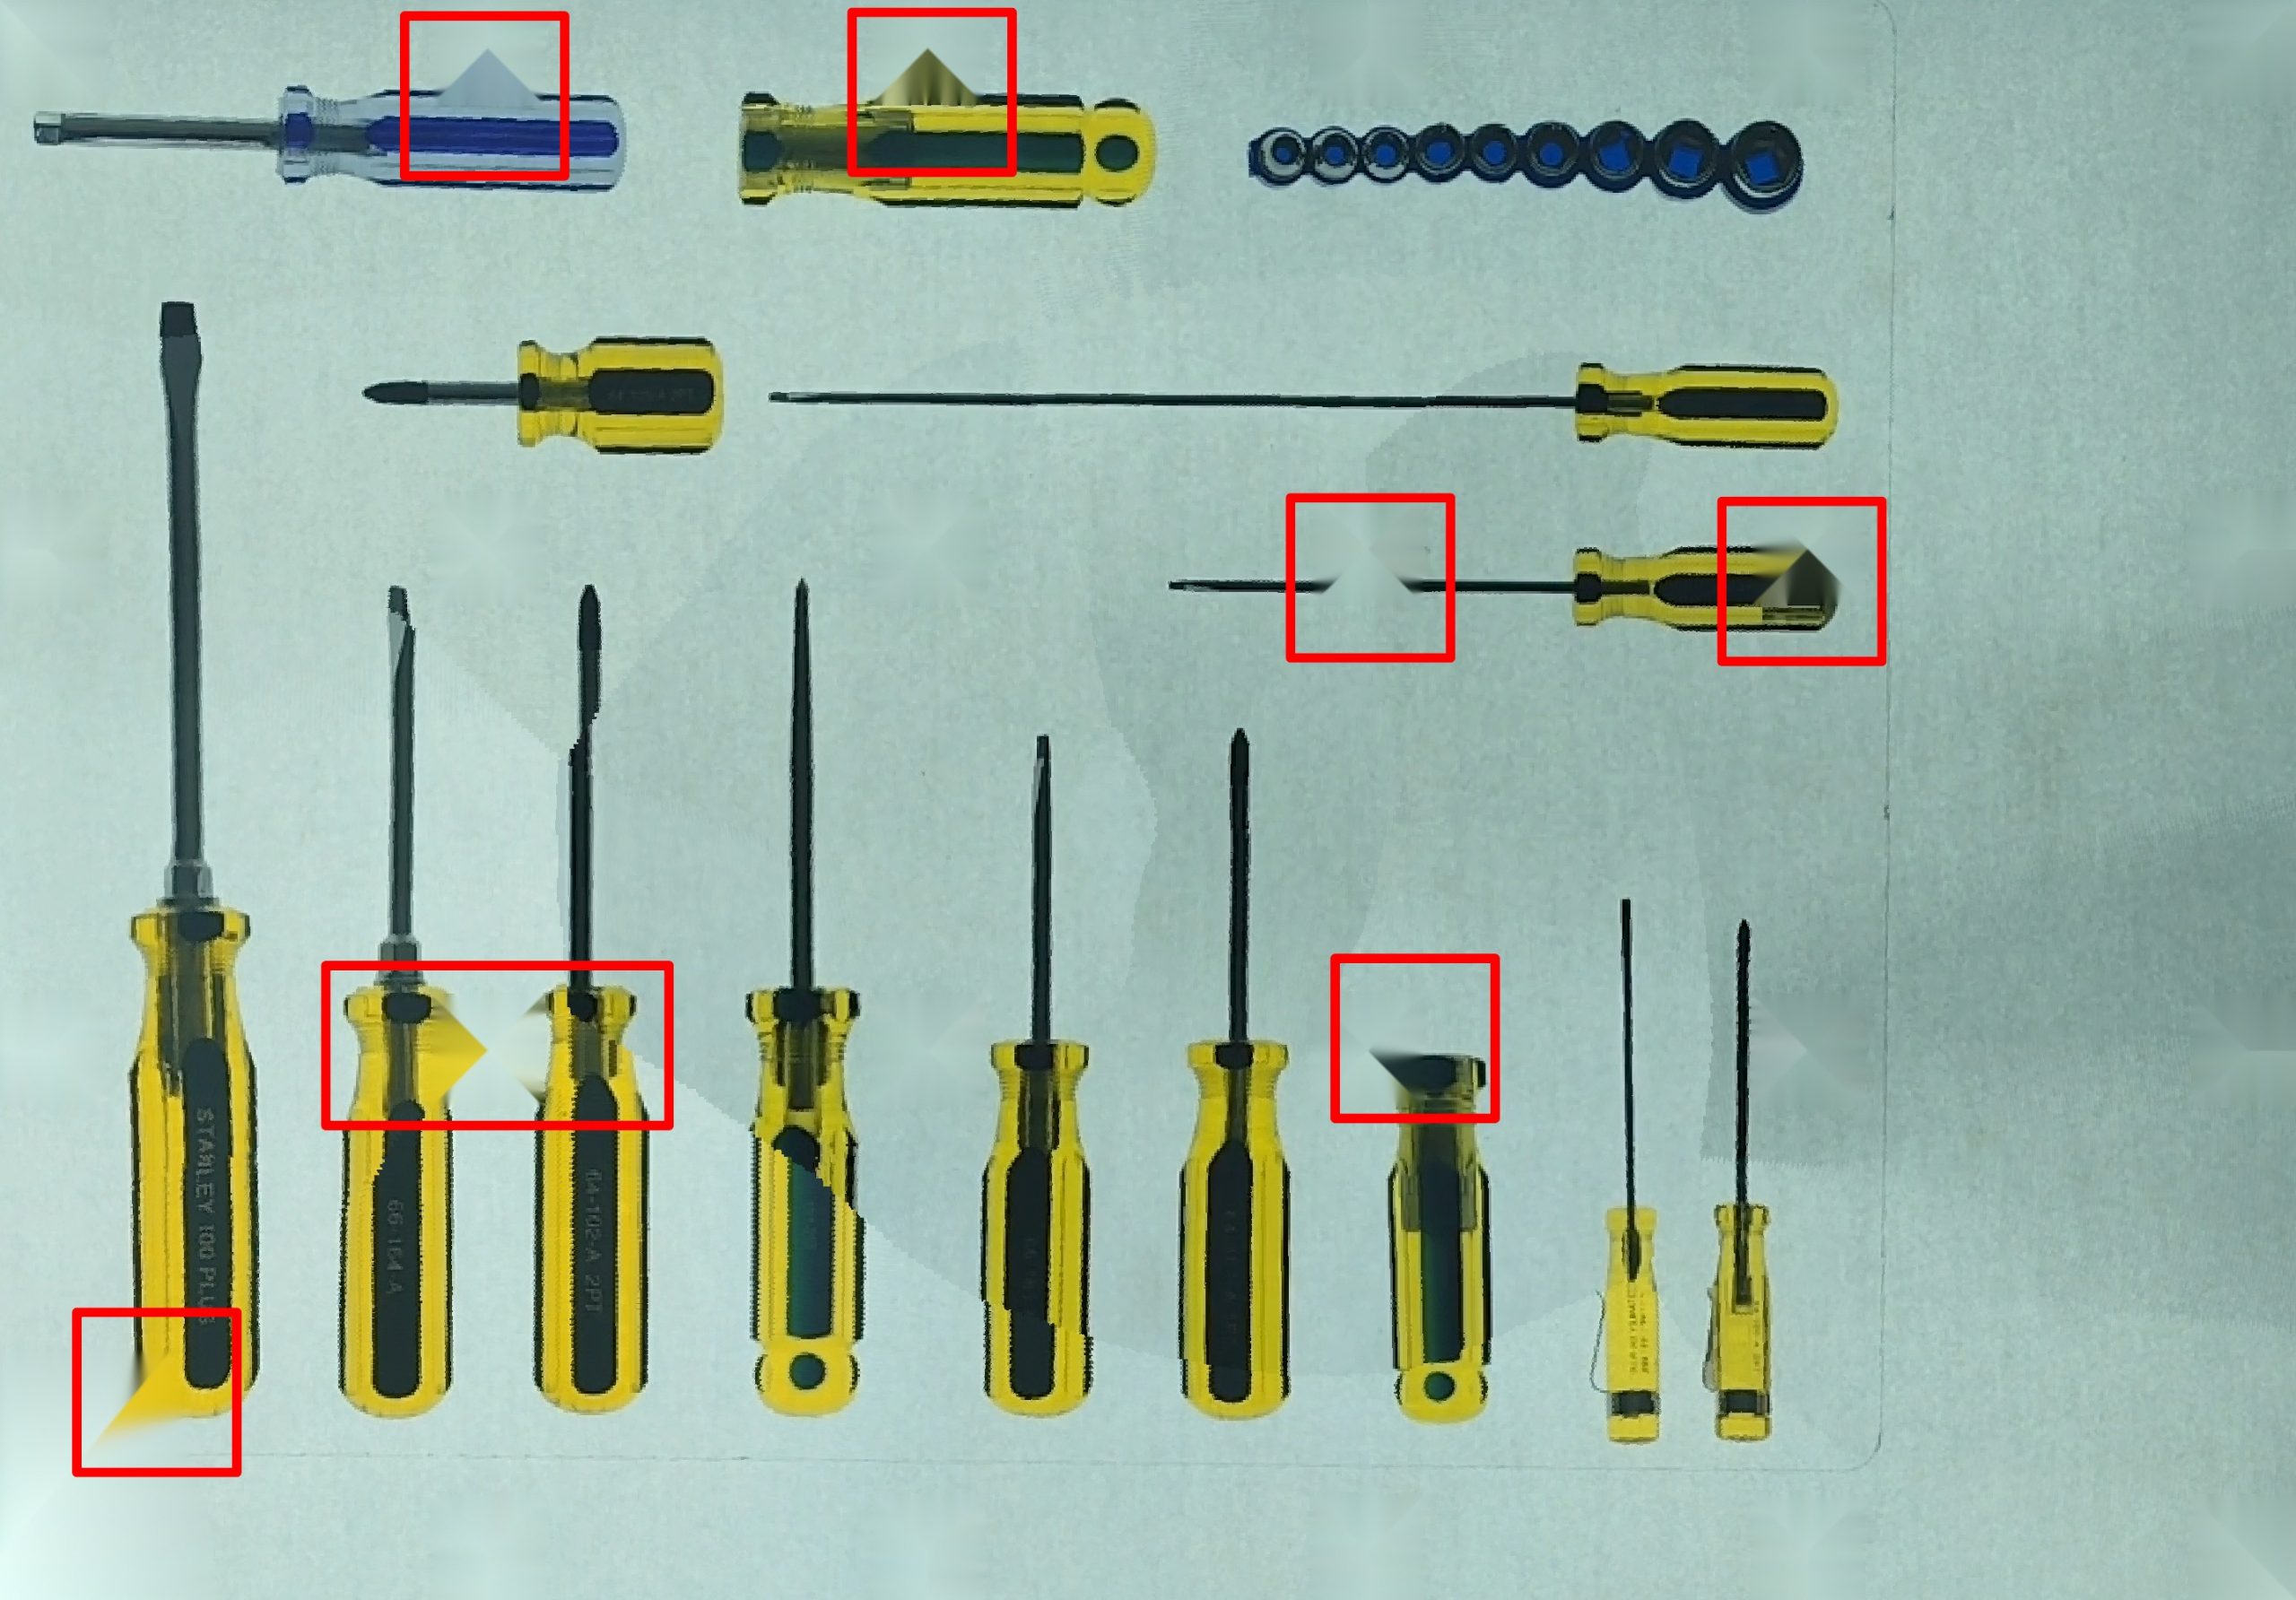
The image below shows an example result of incorrect placements, border markers covered fully or partially and internal markers partially visible.
Verifying the Template ID
Before starting the image stitching process:
For Area Scan Portal users: Confirm that the Template ID in the portal matches the one in ContourTrace.
For smartphone/ digital camera users: Verify that the same PMT is used for capturing and stitching in ContourTrace.
Checking PMT Orientation

Ensure that the word “Top” on the printed PMT is facing upward as shown in the reference image.
Incorrect orientation can lead to stitching errors or distorted results.
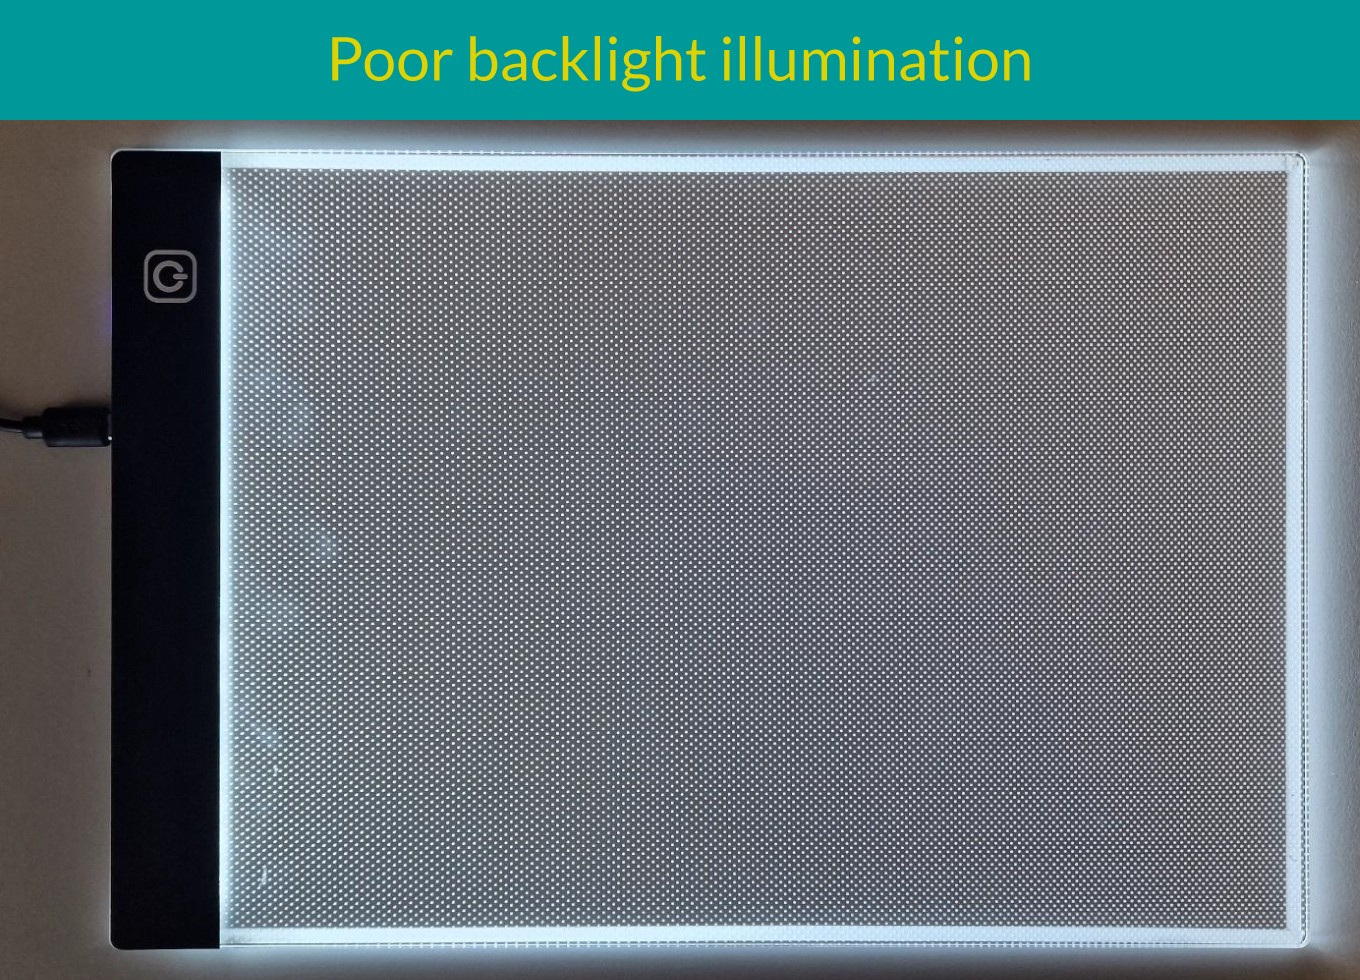
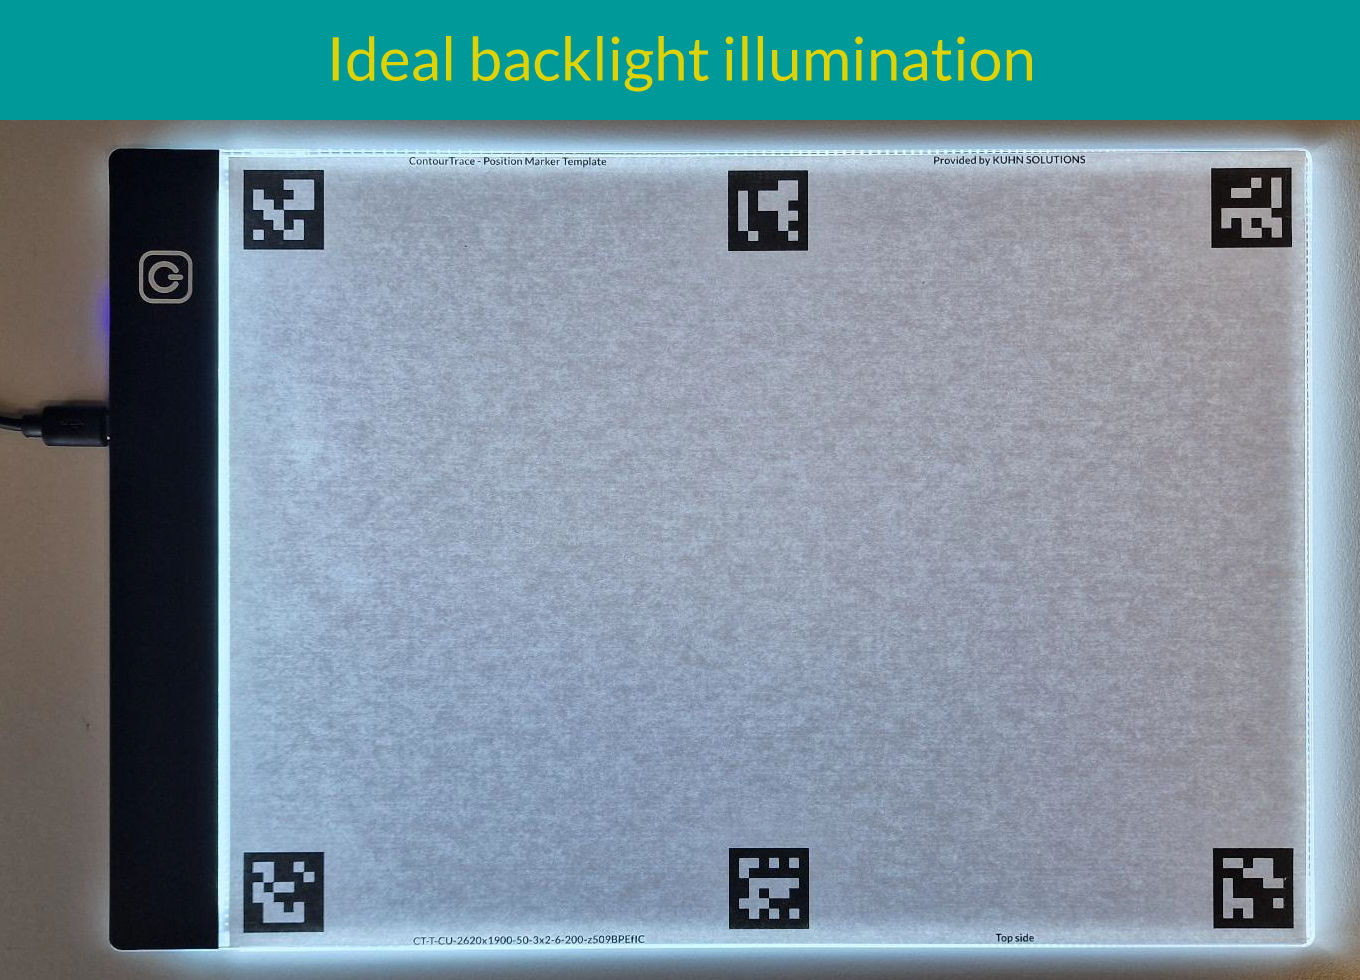
Lighting Setup (for smartphone and digital camera users)
Proper lighting dramatically improves scanning accuracy:
- Avoid strong reflections and overexposure, especially for shiny objects.
- Use a diffused backlight source (e.g., LED panel under the PMT).
- Ensure even illumination across the entire template and object.
Camera Movement Guidelines
When scanning with a smartphone or camera:
- Maintain a consistent distance so that at least four position markers are visible in every frame.
- Move the camera smoothly and slowly over and around outline of the objects.
- Avoid sudden movements to help the algorithm track position accurately.
Optimizing Image Stitching Performance
If your input selection is “Video”, to speed up processing while maintaining accuracy:
- Start with a Skip Video Images value of 3–5.
- If your system performs well, lower the value for higher accuracy.
- Adjust as needed depending on your PC performance and object complexity.
💡 Tip: Higher skip values speed up processing, while lower skip values improve stitching accuracy.